


Drilling holes in granite can be a difficult task due to its hardness and durability. However, with the right tools and techniques, you can achieve precise and clean holes. This article will explore the various tools that can be used to drill holes in granite.
Drilling with a Drill Bit

The drill bit is one of the most commonly used tools for drilling into granite. However, not all drill bits are suitable for the task. Here are some key considerations and steps to effectively drill into granite:
Choose the right drill bit:
- Drill bit type: A standard handheld drill can be used, but be sure to select a drill bit that is powerful enough to handle the hardness of the granite. Hammer drills or rotary hammer drills are generally recommended as they provide the force and impact needed to penetrate the stone.
- Drill bit selection: The drill bit is critical to drilling success. Use diamond drill bits designed for hard materials like granite. Diamond drill bits are known for their durability and ability to cut through hard surfaces without becoming dull easily.
Preparation before drilling:
- Lubrication: Before you begin drilling, apply a lubricant, such as water or cutting oil, to the cutting edge of the drill. This helps cool the drill and prevents it from overheating, which could cause damage or reduce the efficiency of the drill.
- Mark location: Clearly mark the location where you want to drill. This ensures accuracy and helps maintain the correct angle during drilling.
Drilling technology:
- Stability: When using a handheld drill, it is critical to keep the drill steady. A steady hand helps maintain the correct angle and prevents the drill from straying off target.
- Angle and direction: Drill in the preset direction and angle to achieve the desired hole position. It is recommended to drill at a low speed first to make a pilot hole, and then increase the speed for deeper drilling.
- Apply pressure: Be careful not to use too much force when drilling. Excessive pressure can damage the drill bit and the granite. Allow the drill bit to work on its own, applying just enough pressure to keep it engaged with the granite surface.
Cutting Granite with Diamond Wire Saw
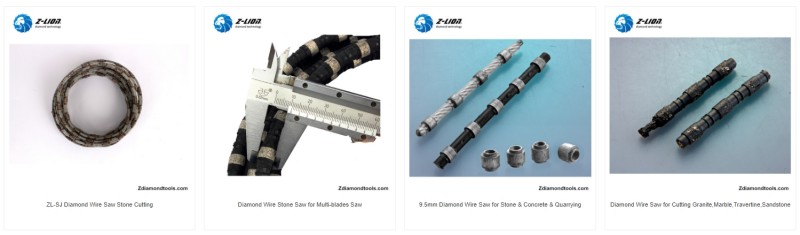
What is a diamond wire saw?
A diamond wire saw consists of a steel wire with diamond segments connected at regular intervals. This design enables the saw to efficiently cut through hard materials such as granite. The wire's flexibility enables it to make intricate cuts, whether in straight or curved shapes. Preparation before cutting
- Mark the cutting area: Before you begin cutting, always mark the area you are cutting. Use chalk or a marker to outline the desired shape and size on the granite surface. This step ensures the accuracy of the cut and helps guide the cutting process.
- Set up your work area: Make sure your work area is clean and free of clutter. A tidy environment reduces the risk of accidents and provides a clearer view during the cutting process.
- Water cooling: Diamond wire saws require water cooling during operation. Before starting, set up the water supply system to keep the wire saw lubricated and cooled. This will not only extend the life of the wire saw, but also minimize dust and improve cutting efficiency.
Operating a diamond wire saw
- Positioning the saw: Position the diamond wire saw at the starting point of the marked line. Make sure the diamond wire saw is perfectly aligned with the cutting mark to achieve a straight cut.
- Start cutting: To begin cutting, slowly cut into the granite with the diamond wire saw. Apply gentle pressure to keep the saw blade in contact with the material, but do not apply excessive force. Applying excessive force can cause premature wear or damage to the saw blade.
- Follow the marked line: Carefully follow the pre-marked lines when cutting. The flexibility of the diamond wire saw makes it easy to adjust and handle curves and angles more easily. Maintain a steady speed to ensure a clean, precise cut.
- Cooling and lubrication: Continuous monitoring of the water supply ensures that the wire remains cool and lubricated during cutting. This helps prevent overheating and prolongs the life of the diamond segments.
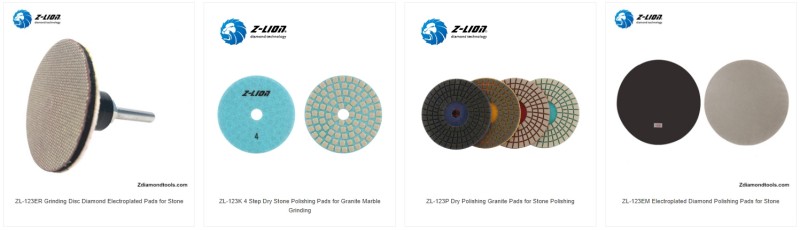
Grinding with a Polishing Pad: Finishing Holes in Granite
When working on granite, especially after drilling, achieving a smooth, polished surface is essential for both aesthetics and practicality. Polishing pads are an effective tool for this task, allowing for precise shaping, grinding, and polishing of granite surfaces.
What are polishing pads?
A polishing pad is a flexible abrasive tool designed for use with a polishing machine or grinder. Polishing pads are available in a variety of grit sizes to provide varying degrees of abrasion and polishing. They are particularly useful for fine-tuning openings and achieving a high gloss finish on granite surfaces.
Preparation before using polishing pad
- Cleaning granite surface: Before you begin polishing, make sure the granite surface is free of dust, dirt and other impurities. Wipe the area around the hole with a clean cloth or soft brush. This step is crucial because any debris may interfere with the polishing process, causing scratches or uneven surfaces.
- Dry surface: After cleaning, make sure the granite is completely dry. Moisture will affect the performance of the polishing pad and may result in poor polishing results.
- Choose the right polishing pad: Choose the right polishing pad for the task. Different polishing pads are designed for different levels of abrasion and polishing, so choosing the right polishing pad is crucial to achieving the desired polishing result.
Using a polishing pad
- Preliminary grinding: Begin by mounting your chosen polishing pad onto your polishing machine or grinder. Use a coarse sandpaper pad first to smooth the edges of the holes and remove any rough spots. Apply gentle pressure and keep the polishing pad moving to avoid overheating the granite.
- Gradual polishing: After the initial sanding, switch to a finer polishing pad. This step is critical to smoothing the surface and preparing it for the final polish. Continue moving the polishing pad in an even motion, making sure the polish is evenly applied across the entire surface of the granite.
- Replace the polishing pad: Gradually change to finer polishing pads as polishing progresses. This helps to achieve a high gloss finish. During this process, please be patient and don't rush, otherwise it will cause an uneven surface or damage the granite.
- Control power: When using a polishing pad, it is important to control the pressure. Applying too much pressure can result in over-abrasion, which can damage the granite or leave unwanted grooves. Allow the pad to abrade on its own, applying moderate pressure to keep it in contact with the surface.


